Intro
Partition may be a long and confusing word for some people, especially people who have never installed an Operating System. When installing, lets say Windows, you can have the wizard format the entire disk, or you can create a custom layout. With a custom layout you are allowed to make your partitions into a specific size. Since windows uses the 1024MB= 1 GB and hard disk(hard drive) manufactures us 1000MB=a GB you will never see the correct space listed in windows.
What Does the word mean?
According to dictionary.com, partition means a part, division, or section, as suggested by the beginning of the word, being part.
How to do it? (Partitioning and Formatting erases all data on the drive section being changed, so if you want to keep something, please back it up!)
Most people won't have any unallocated space because they purchased their PC partitioned with Windows. But lets say you bought a new hard drive. You would probably have to partition it so Windows can see it.
In Windows
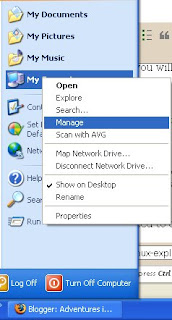
To partition your new hard disk in Windows you need to click start, go to my computer, right-
click, and click manage. You will get a screen called computer management, with a menu on the
right. Click Disk Management. Under the new drive you will see some space with a black bar on
the top. This space is unallocated space.
 To partition it you have to right click and click New
Partition, which will bring up the partition wizard. When the partition wizard has loaded, click
next, select Extended Partition, next again, enter the amount of space in MB, next yet again,
then finish. You are still not finished though, you have to create another partition.
Once you have made the extended partition, you will have a space called Free Space with a
green bar above and dark green all around it. Right click on it, and select new logical drive.

Once you have the wizard up, click next, next again, enter the space to be used, the drive letter, you probably want to format it, just check Perform a quick format, and put in a label, like Local Disk or something, and click next. Review your choices, and click finish.
Linuxguy and Linux-exploration.blogspot.com, are not responsible for ANYTHING you do to your computer. This is simply a guide, and it may help you out, but the author(Linuxguy) and his blog(Linux-exploration.blogspot.com) are not responsible for any damage or changes done to your computer or other items.

No comments:
Post a Comment